Moto Pants are all the rage right now, and “hacking” existing patterns to make them is very popular in several of the sewing groups I belong to on Facebook. The tutorial is really pretty easy, as long as you don’t overthink it, and the Moto Pants can be made with any existing skinny pant pattern.
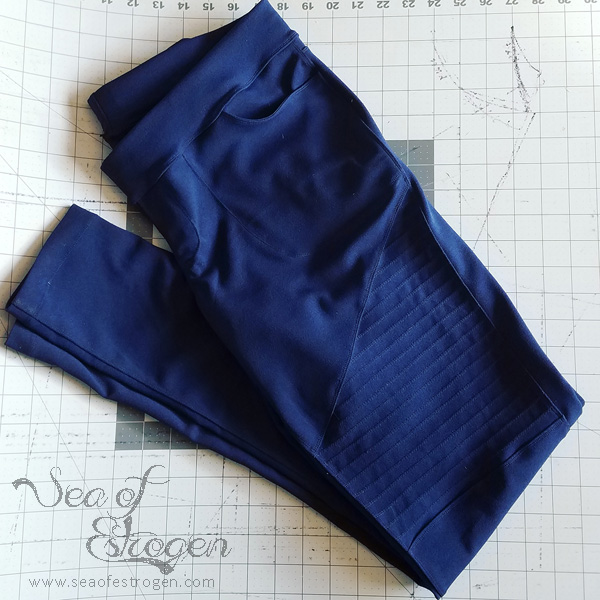
The process of making a regular pant pattern into a moto pant pattern is relatively simple, and it requires only basic supplies. I used this really pretty Navy Scuba Crepe (not yet listed) from Mily Mae Fabrics for this pair. In addition, I have made a pair out of her “Raven” French Terry. I learned how to make these pants following a tutorial by Clothed In Vermillion on Instagram; however, I wanted to create a more in-depth tutorial with additional images.
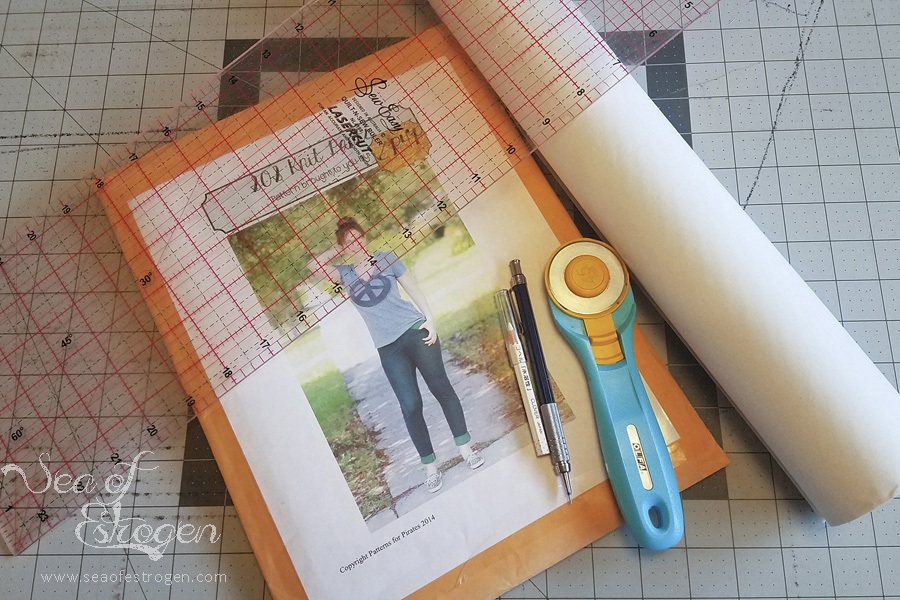
Materials Required
You want to make sure you use fabric with the appropriate stretch for the pattern you choose to alter.
- fabric
- pattern (any skinny pant pattern will work. I used the SOS Pants from Patterns for Pirates)
- tracing paper
- pen or pencil
- quilting ruler and mat with rotary cutter or scissors
Pattern Alteration
To begin, prepare your pattern as if you were making it as instructed. For me, this means tracing the original printed copy in my size (so I always have all sizes available to use).
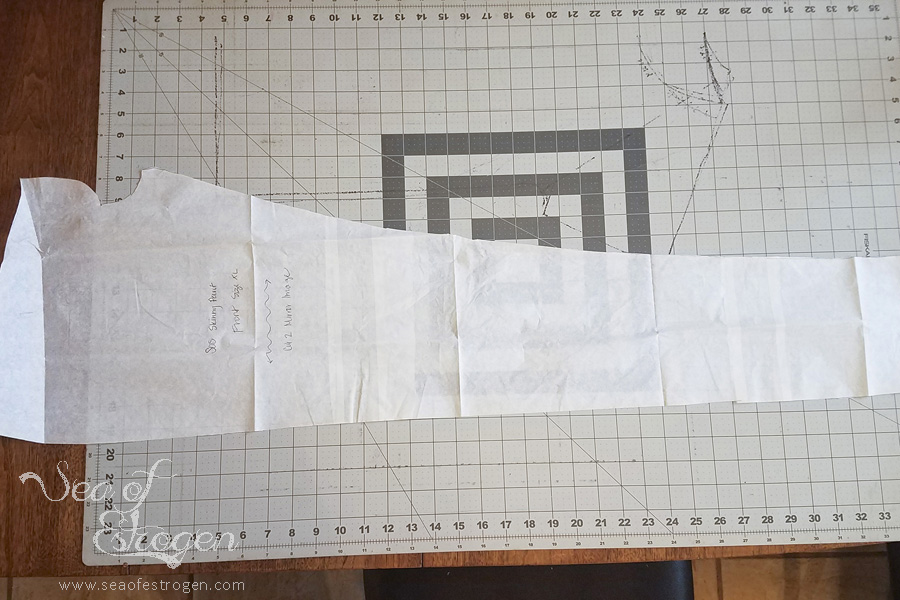
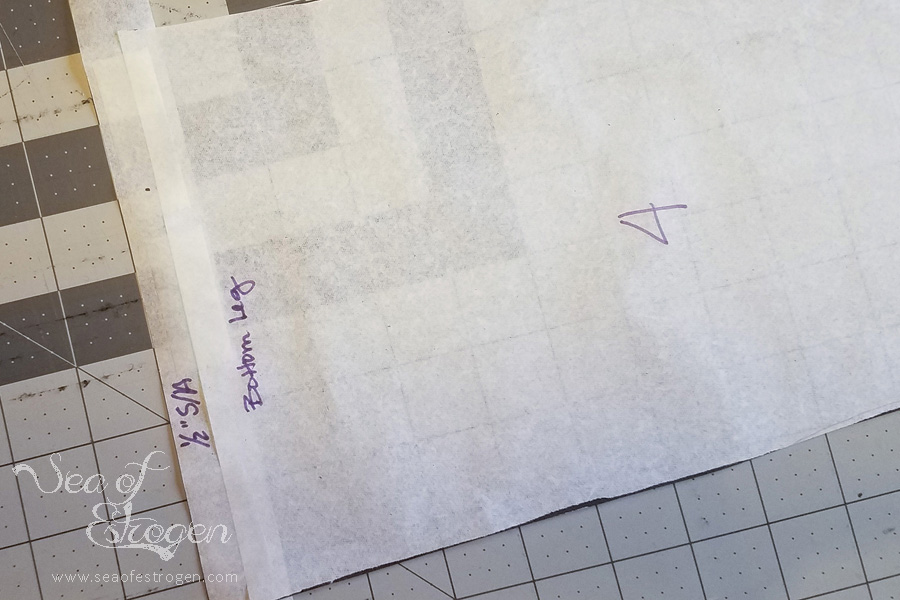
Once you have your pattern traced, make any height adjustments needed. I add a total of 3″ to the length of my pants by slashing and spreading the leg length in two different places (1-1/2″ each).
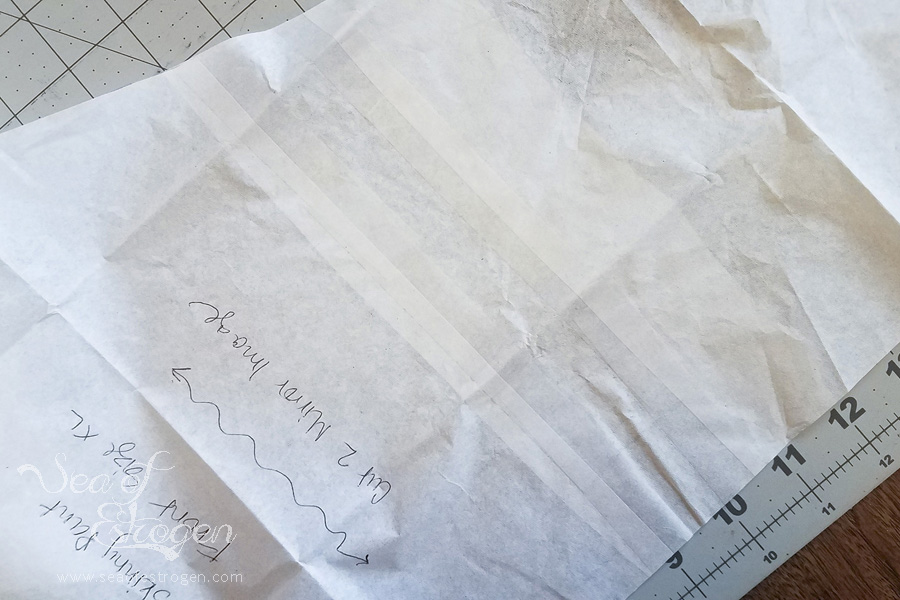
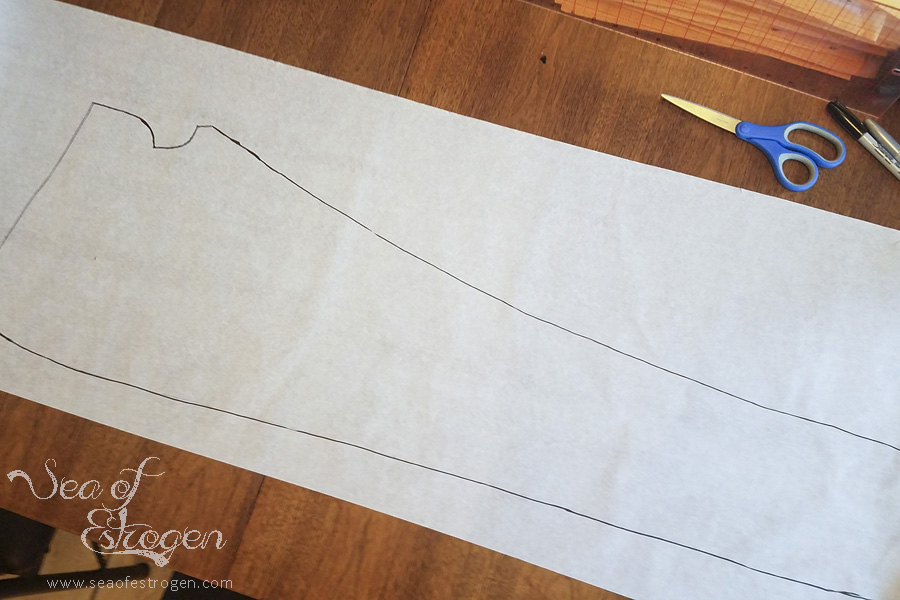
Now, since we are essentially going to destroy the front pattern piece, RETRACE it again with the height adjustments (if any). I traced mine in black sharpie so the pictures would be easier to see. This is now our working front leg pattern piece.
Creating Pattern
Next, we get to move on to the “hack” – marking your “moto” pieces.
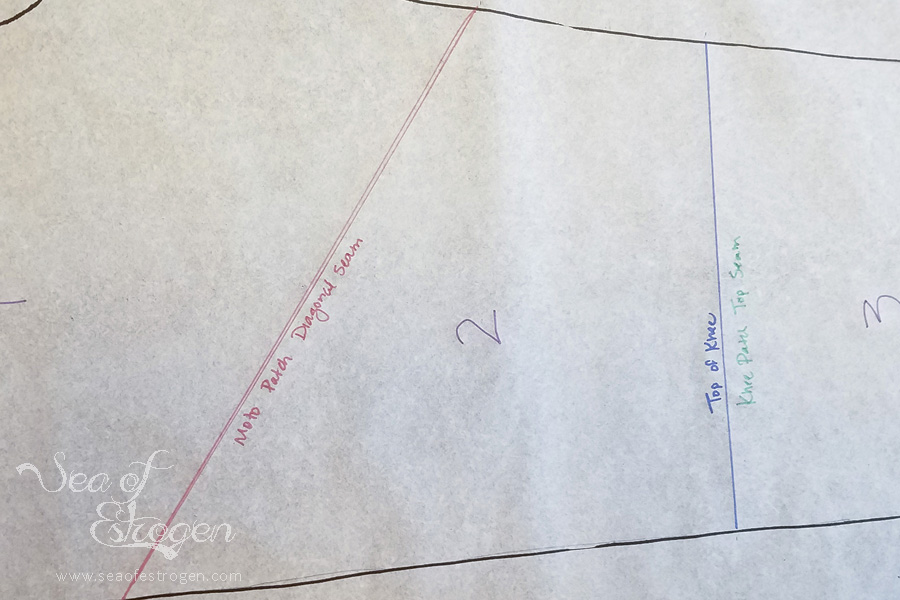
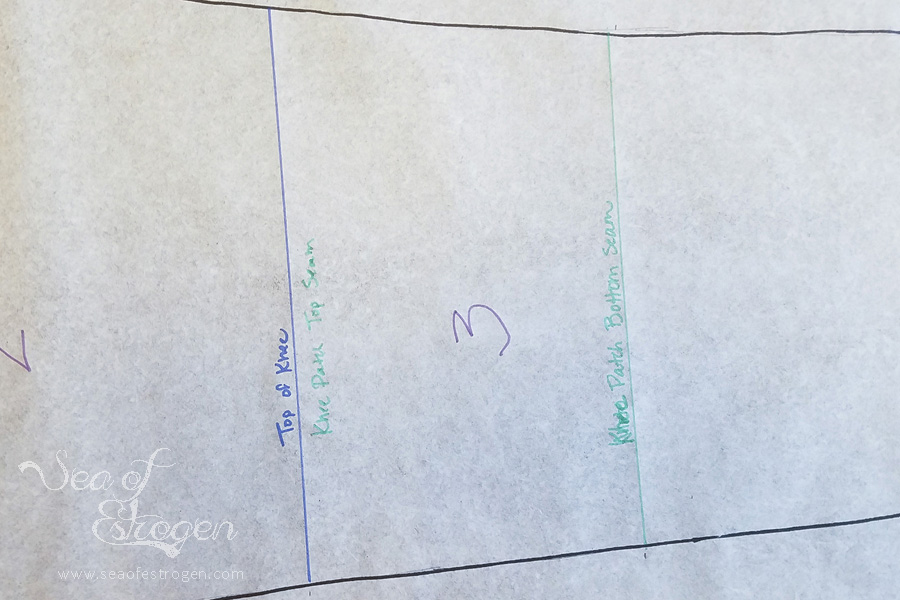
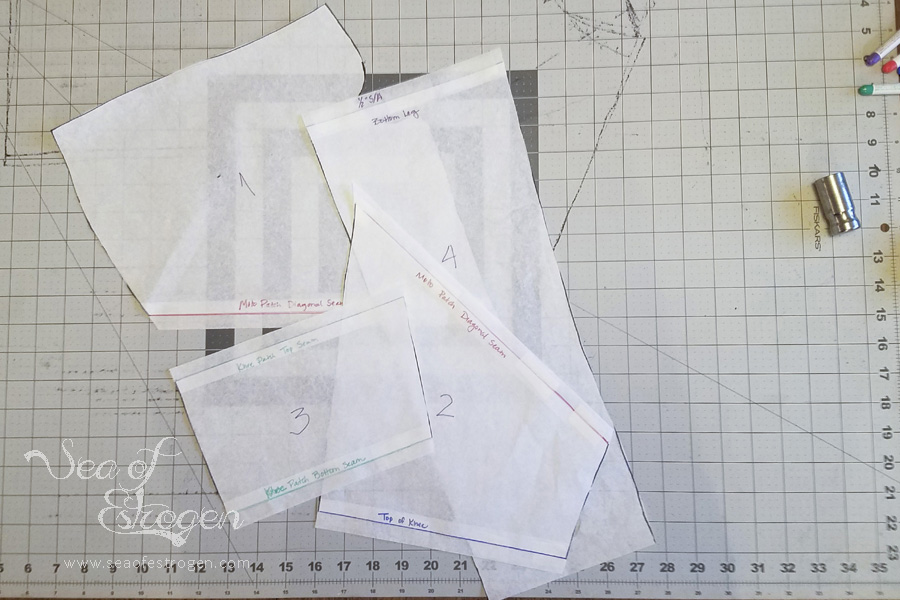
- Measure your inseam from crotch to the top of your knee and make a mark across the pattern leg (blue line)
- Measure from above your knee to below your knee, if adding the knee patch and mark pattern (green line)
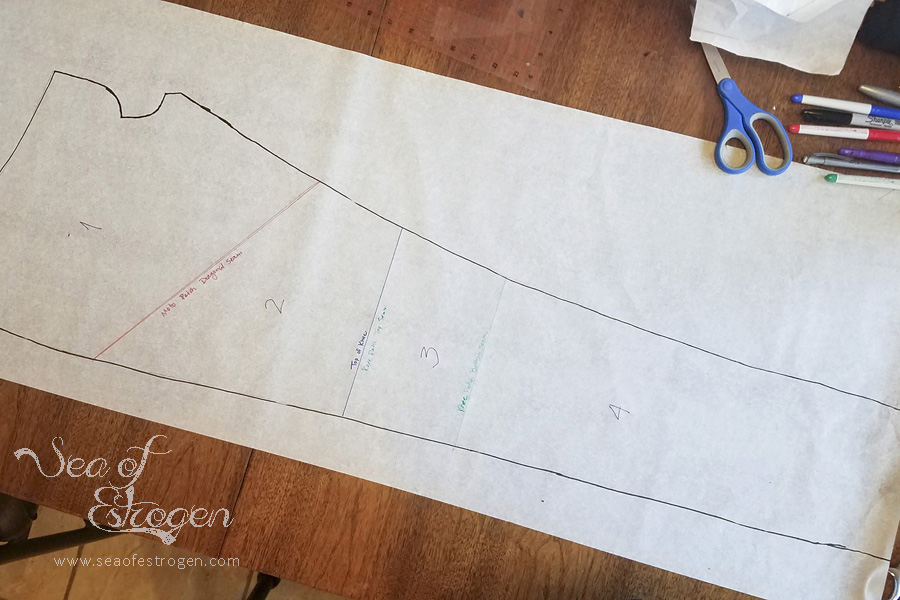
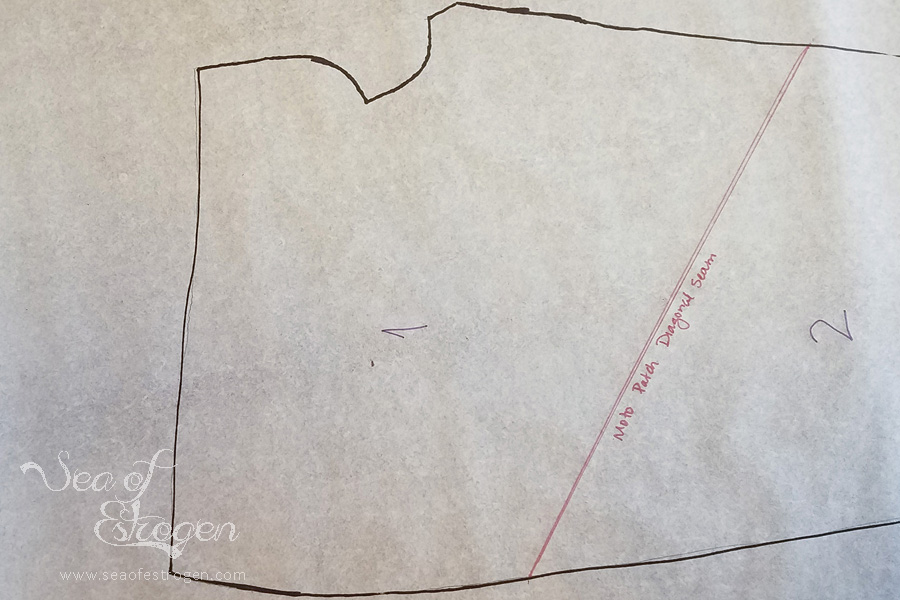
- Shape your moto patch however you would like. I marked mine at 4″ above my knee on the inseam of the pattern and 11″ inches on the outside of the leg to create a diagonal line (red line)
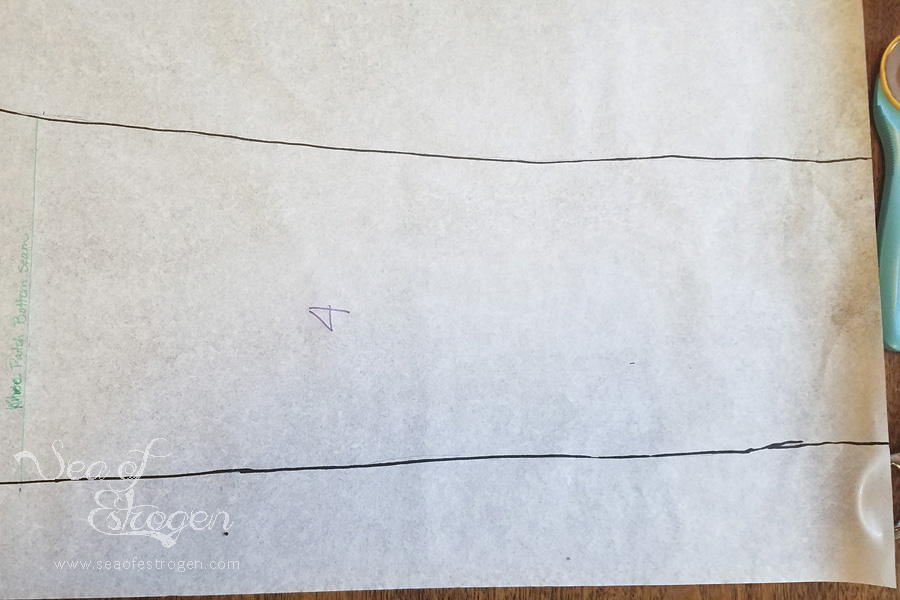
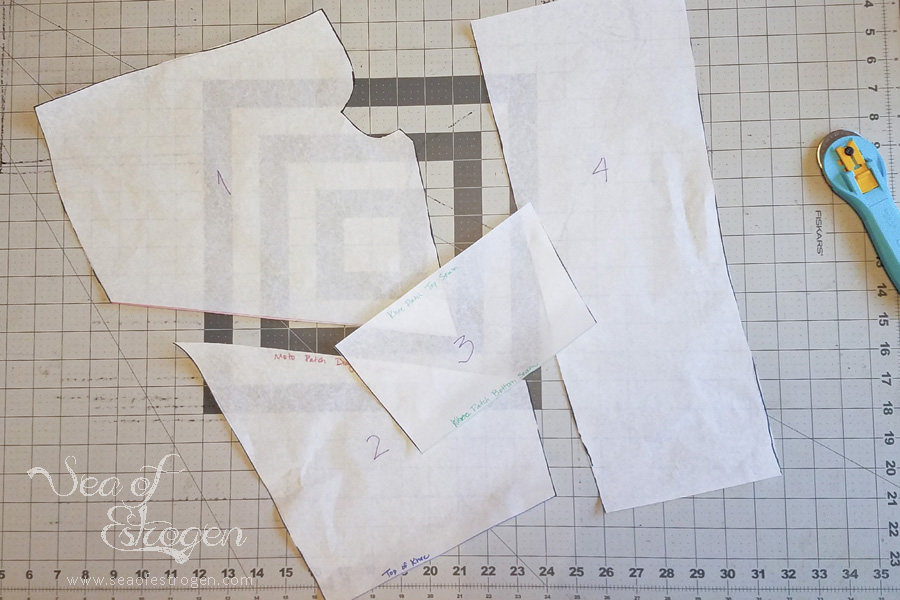
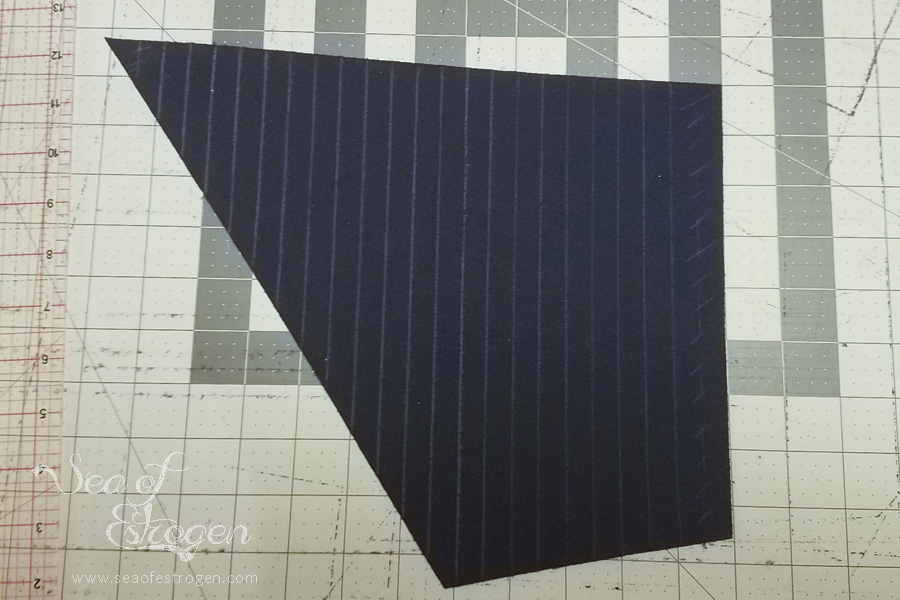
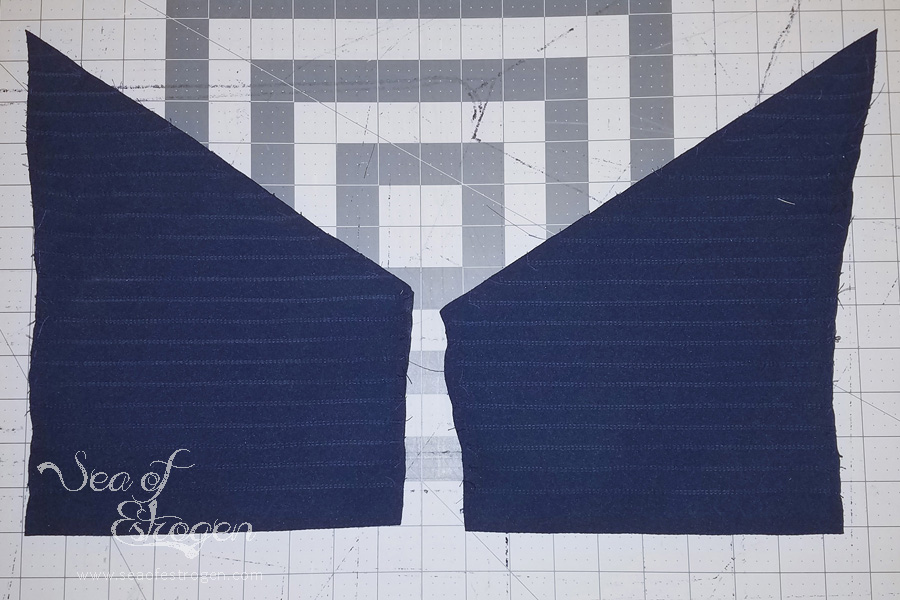
- Your pattern should now have four distinct “pieces” (I numbered mine).
- Cut the pattern apart on the lines you added.
Add Seam Allowances
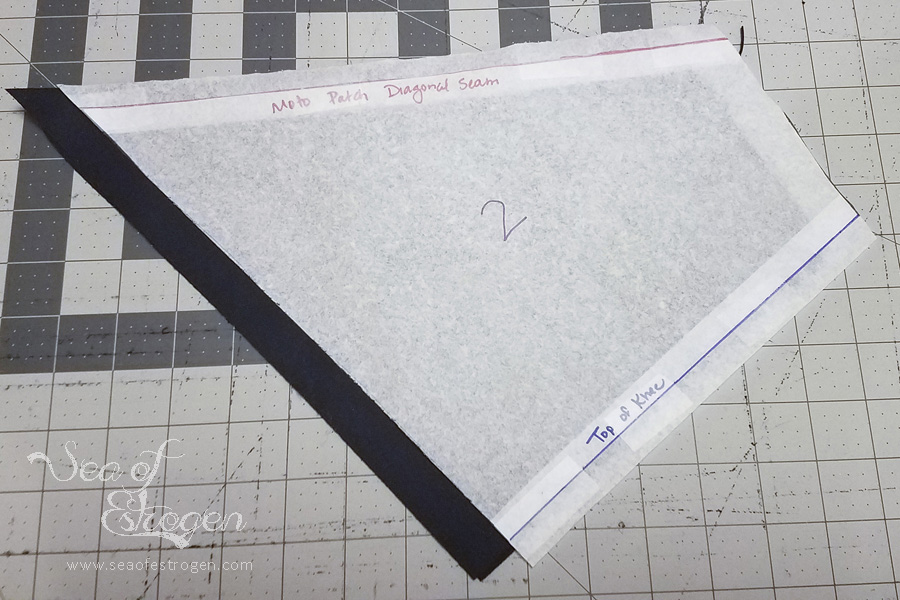
The next step is probably the most important – you must add seam allowances to each of the pieces you just created. They will be added to each edge that connects to another piece. I added 1/2″ seam allowance to each edge by taping another piece of tracing paper to the edge.
Cut Fabric
This step is super simple. Cut two of each of the pattern pieces you just created, and cut all the remaining pieces of the pants pattern (for me, that included back yokes, back legs, and pocket pieces). Be sure to MIRROR them so you end up with four pieces for each leg. Once your fabric is all cut, it is time to start marking the moto patches.
Mark Moto Lines
We are going to be working solely with pattern piece #2 for this step.
- Place fabric right side up on your cutting mat
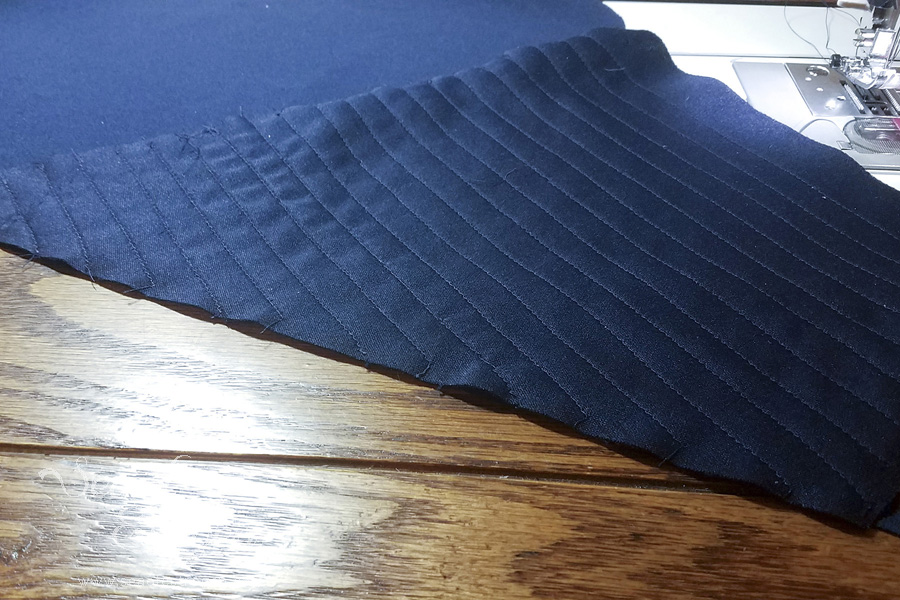
- Using a ruler and fabric marker (chalk or pencil work, as well), mark horizontal lines across the pattern piece at every 1/2″ mark
- Repeat with other leg piece
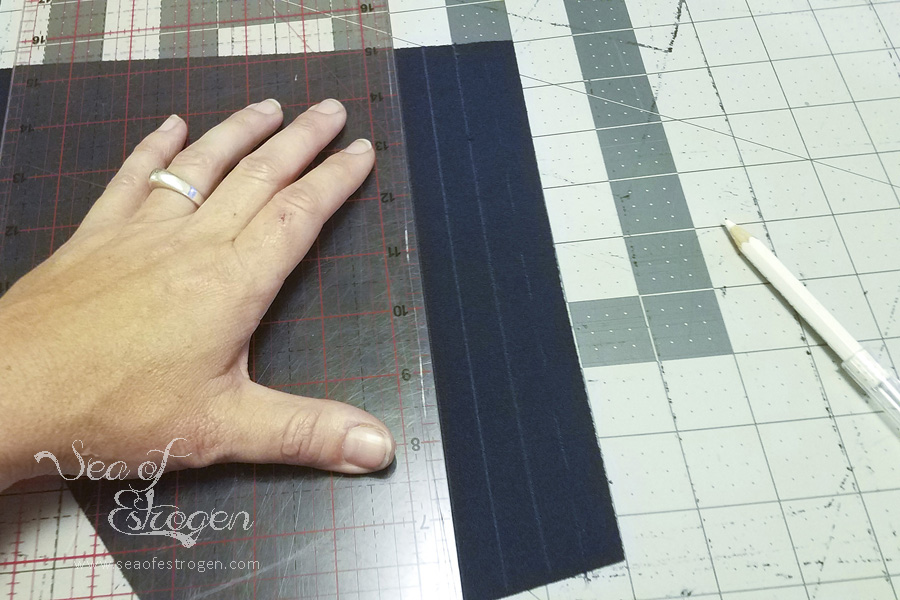
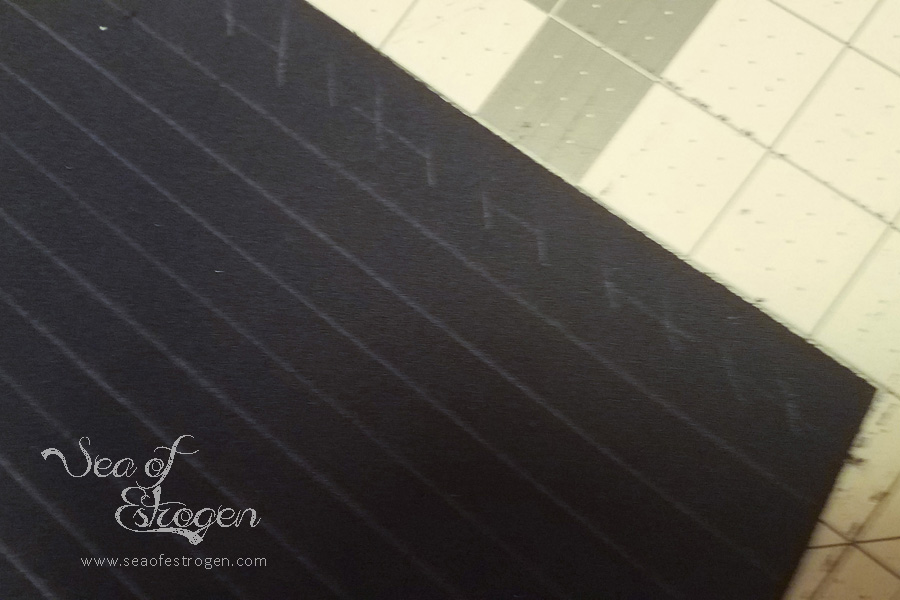
Don’t forget, since we are going to be using a double needle to create the lines, you must mark them on the right side of the fabric.
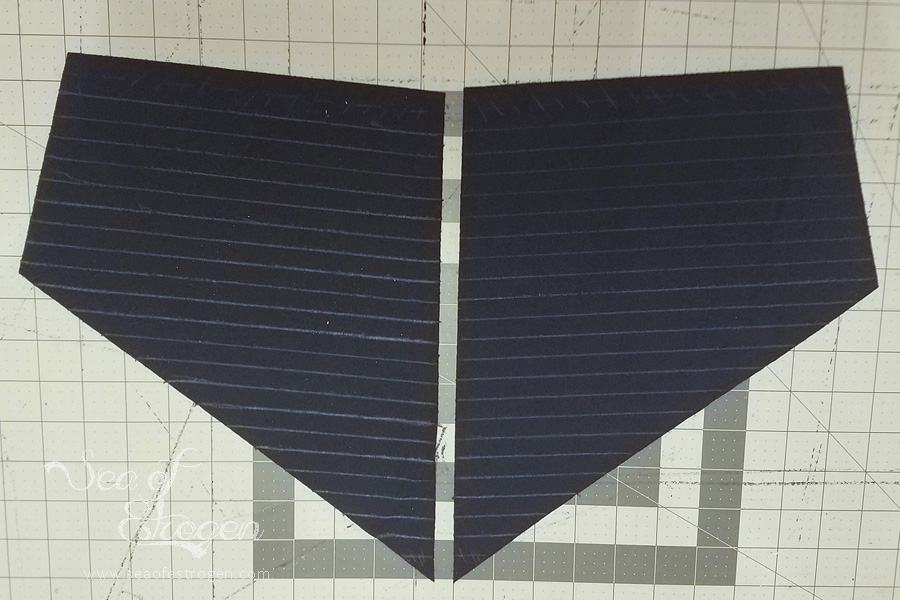
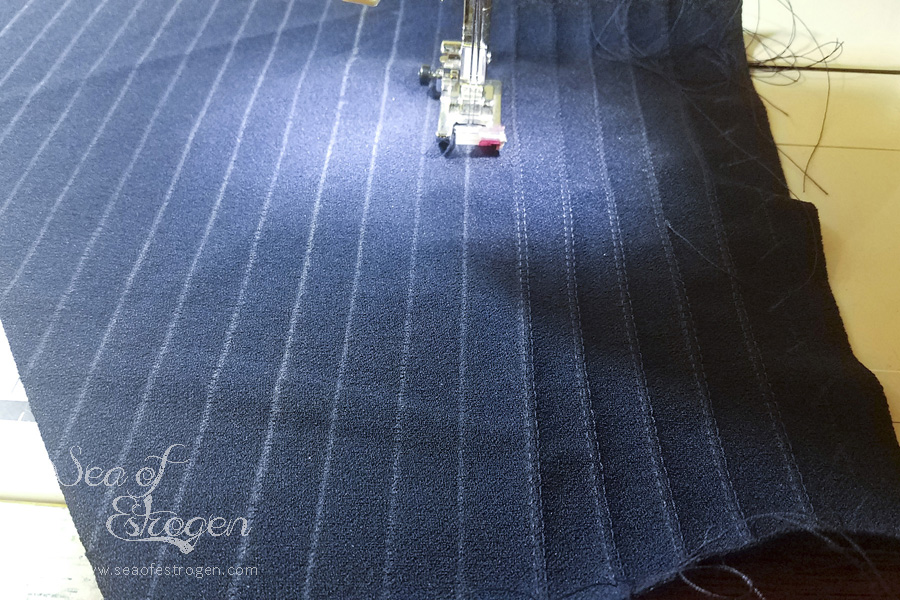
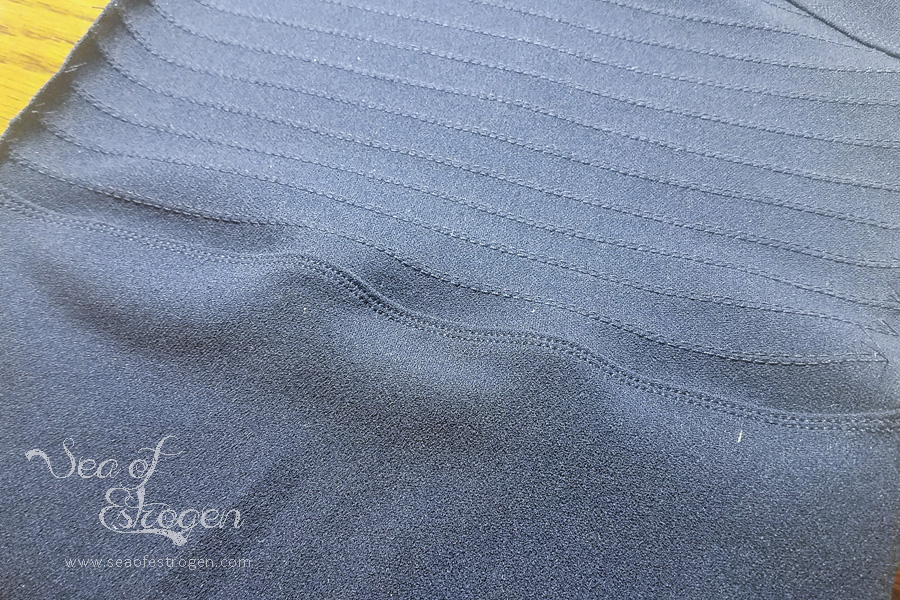
Sew Your Lines
Using a twin needle, top stitch along each of the lines you drew in the last step. I did not backstitch at either end since the stitches will be held in the seam allowance. I used thread the same color as my fabric, but you could make your pants really interesting by using a contrasting thread. Repeat with the second piece. You can also skip the first line at each end (mine have hash marks across them) since they are at the point of the seam allowance.
Construction
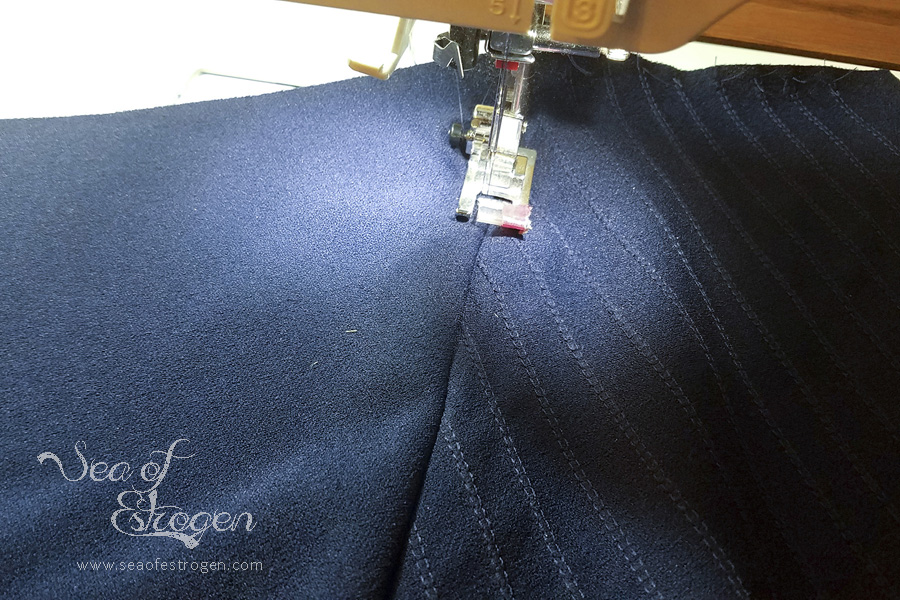
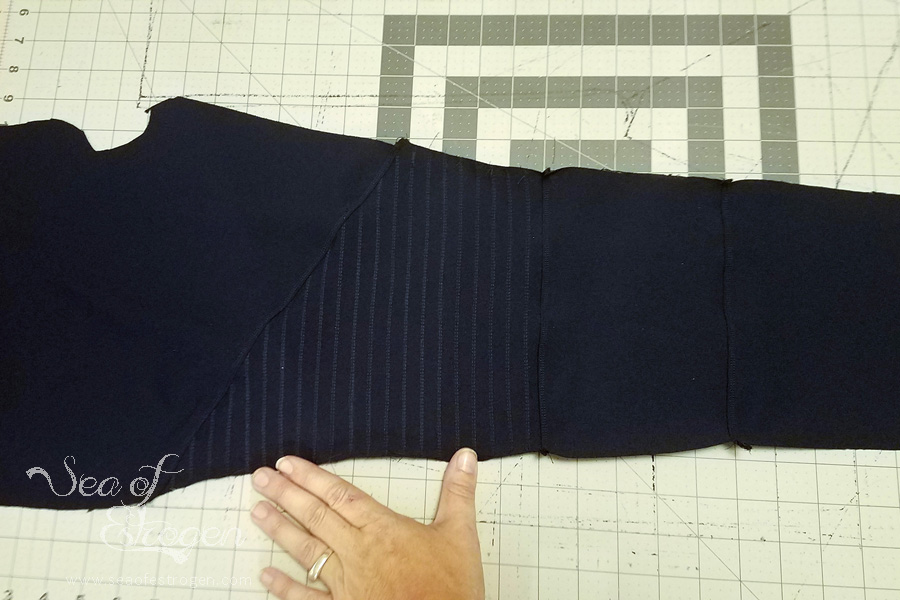
Now that we’ve taken the pant leg apart and finished the topstitching, we can put the leg pieces back together!
- Line up the diagonal cut line between pieces #1 & #2 – right sides together
- Stitch
- Press the seam up towards the waistband and topstitch
- Next, line up the knee patch and moto patch pieces (pieces #2 & #3), and stitch together
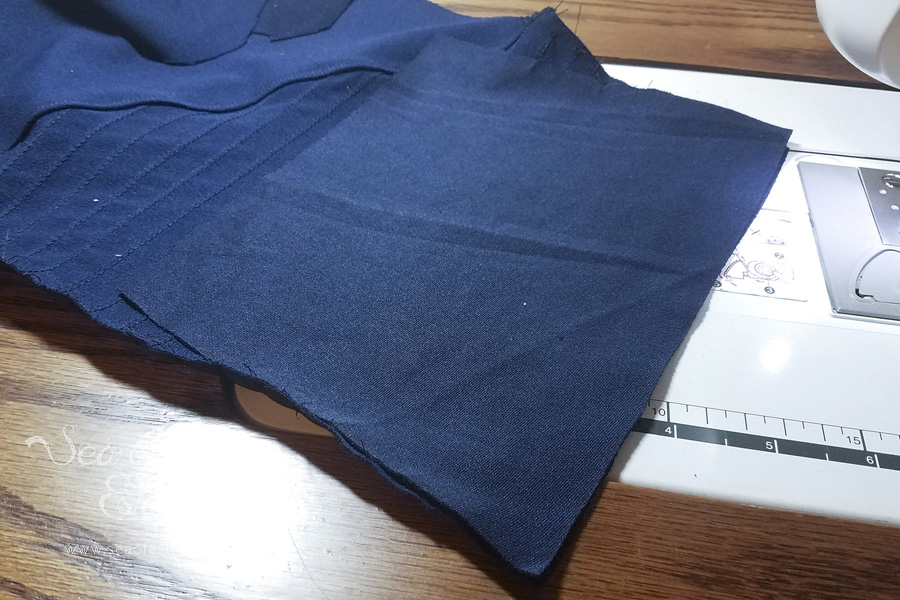
- Press this seam towards the ankle and top stitch
- Next, align pattern piece #4 with the bottom of pattern piece #3 and stitch
- Press seam towards ankle and top stitch
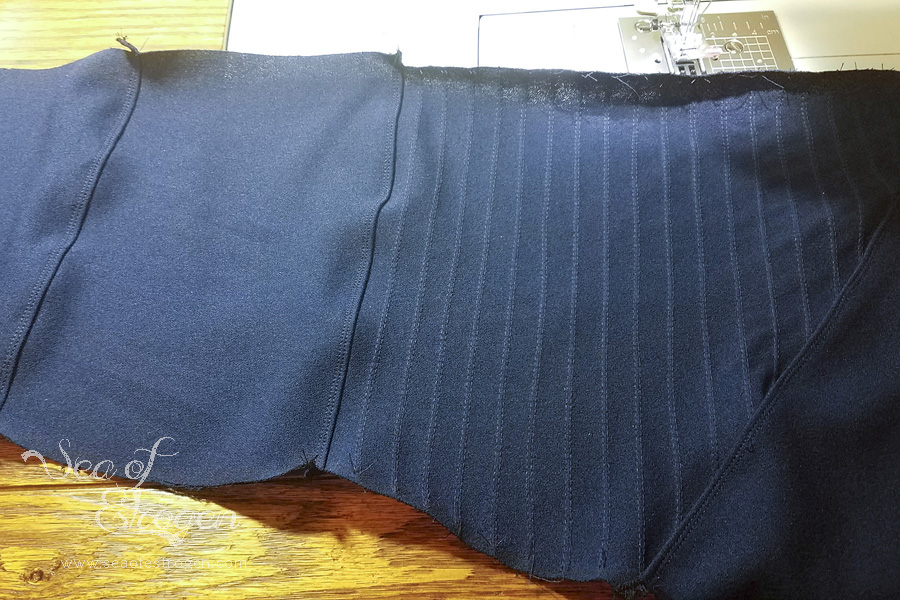
- Repeat with other leg
Your moto pant front leg pieces are now finished!
Pant Construction
The final step is to assemble the pants according to the pattern instructions.
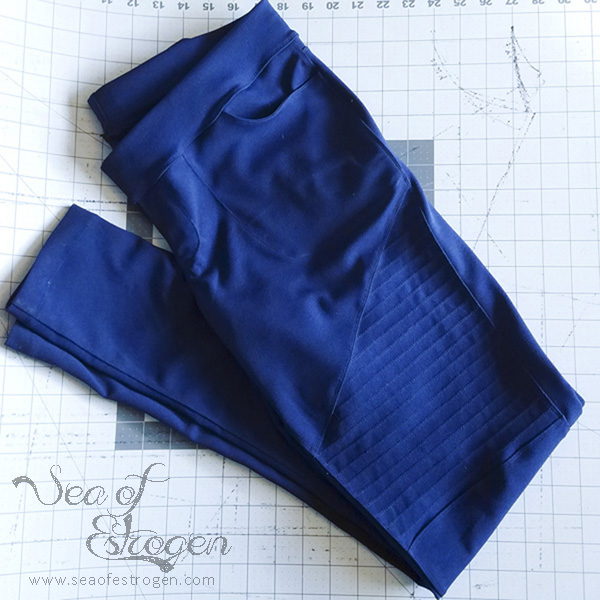
Vóilá!
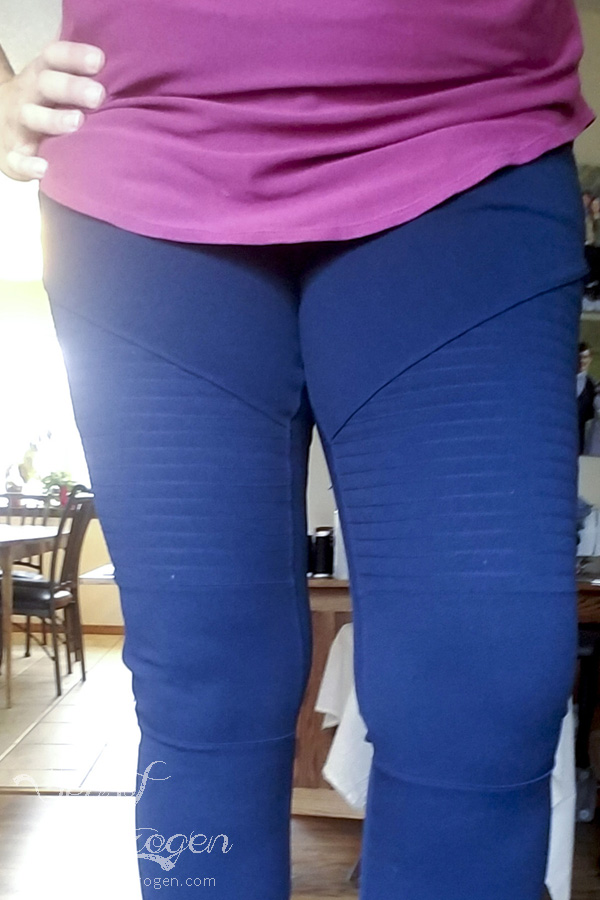
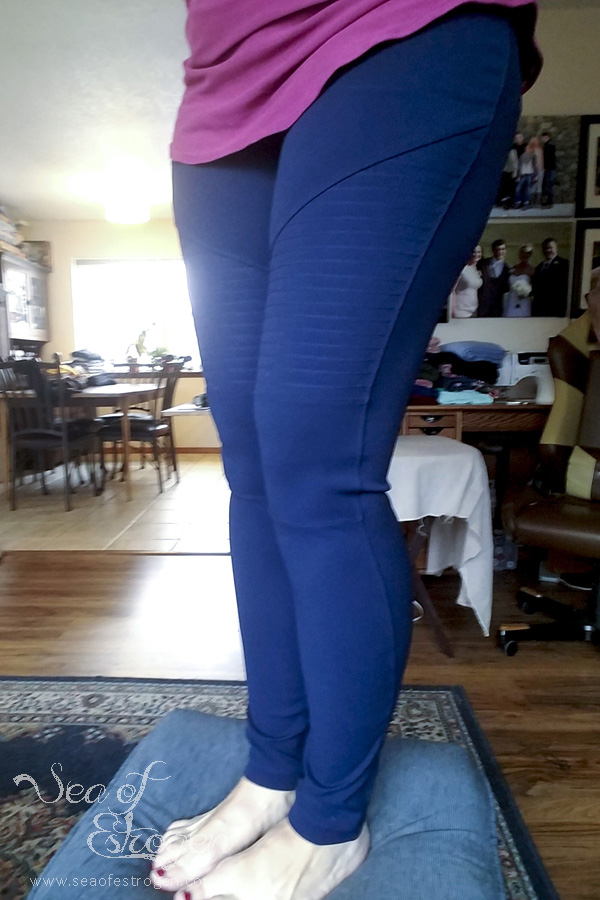
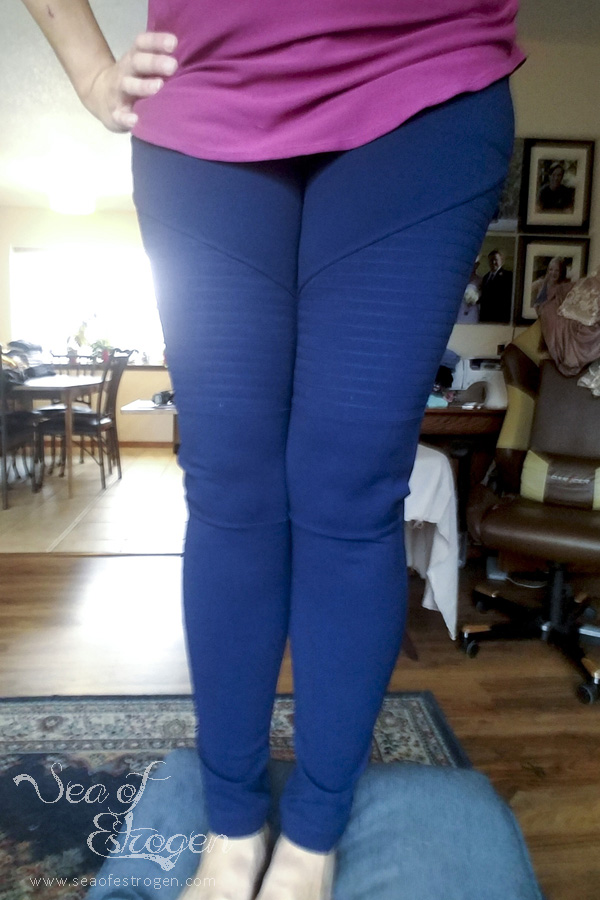
Your moto pants are finished! We got snow, and I didn’t want to go outside, so you’ll have to excuse my modeled pictures standing on the footstool in front of the window. 🙂
Feel free to ask any questions in the comments below, and I will try to answer them as quickly as possible.

Nature Girl. Mom. Wife. Friend. Photographer. Sewer. Crafter. Artist.
To borrow a phrase – “Yeet Ye Riche”

What a clever hack! Thank you for the tutorial; I’m not sure that I would ever do this one (I avoid skinny pants like the plague), but I always love seeing construction techniques. Although, this one is tempting enough to make some skinny pants AND a long tunic to cover all the bumpy parts… Hahaha!
LOL I don’t want the bumpy parts to show either, but I really like this pair of pants.
I just found this post – what a great hack I need to try this! Thanks for the great instructions 🙂
I’m glad it was helpful for you!